How to Assemble an AR 15: A Step-by-Step Guide
Introduction to AR-15 Assembly
The AR-15 is one of the most popular and versatile firearms today, known for its modularity, accuracy, and reliability. Whether you're a firearm enthusiast, a first-time gun owner, or looking to customize your rifle, understanding the basics of AR-15 assembly is a crucial first step.
At its core, the AR-15 assembly combines various components to create a fully functional firearm. While it may seem daunting initially, the process can be broken down into manageable steps, making it accessible to experienced gunsmiths and newcomers alike.
Before diving into the assembly process, understanding the components that make up an AR-15 is essential. The rifle consists of the upper receiver and the lower receiver. The upper receiver houses the barrel, bolt carrier group, and other important functions, while the lower receiver contains the trigger assembly, magazine well, and stock. You should be able to familiarize yourself with these components, which will provide a solid foundation for the assembly process.
Next, assembling an AR-15 requires the right tools and safety precautions. Safety should always be the top priority, and wearing protective gear, such as safety glasses and ear protection, is necessary. Proper tools, including armorer wrenches, pin punches, and torque wrenches, will ensure smooth and precise assembly.
As you begin the assembly process, following a step-by-step guide is crucial to avoid mistakes and mishaps. Each component must be assembled correctly to ensure the rifle's proper functioning and reliability. Please take your time, be patient, and double-check each step to ensure everything fits together snugly.
Assembling an AR-15 offers a rewarding experience and enables you to customize the firearm to your specific needs and preferences. From choosing various accessories, handguards, and optics to selecting a preferred barrel length, the AR-15's modularity allows for endless possibilities.
In conclusion, learning how to assemble an AR-15 is an empowering journey that enables firearm enthusiasts to deepen their knowledge and create a personalized firearm. While initially may seem complex, you can confidently and safely build your AR-15 with proper guidance and attention to detail. Whether for self-defense, sport shooting, or collecting, the AR-15 assembly process opens doors to an exciting and fulfilling world of firearms ownership and customization.
Understanding AR-15 Components
To successfully assemble an AR-15, it's essential to have a comprehensive understanding of AR-15 components. The AR-15 is a modular platform, and each part plays a crucial role in the rifle's overall performance and function.
- Upper Receiver: This is the top part of the AR-15 and houses the barrel, bolt carrier group (BCG), and charging handle. It includes a forward assist and ejection port cover.
- Lower Receiver: The lower receiver is the firearm's serialized part and contains the trigger assembly, magazine well, and stock attachment point. It also houses the fire control group, which includes the trigger, hammer, and disconnector.
- Barrel: The barrel is responsible for accuracy and determines the rifle's caliber. They come in various lengths and profiles to suit different shooting needs.
- Bolt Carrier Group (BCG): The BCG is a critical component responsible for chambering rounds, extracting spent casings, and initiating the firing process.
- Handguard: The handguard is attached to the barrel and provides a gripping surface for the shooter. It also allows for mounting accessories like optics, lights, and foregrips.
- Gas System: The gas system regulates the gas flow from the barrel to operate the BCG. Typical scenarios include direct impingement and gas pistons.
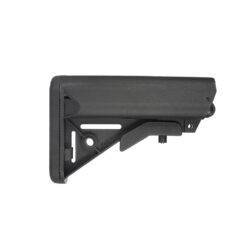
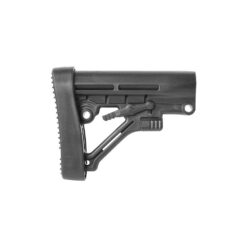
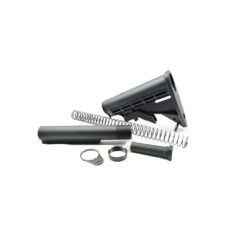
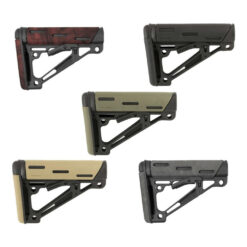
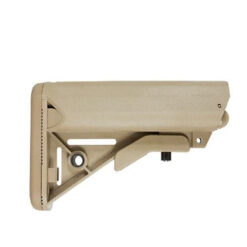
- Stock: The stock provides support and stability, and there are various types, including fixed, collapsible, and adjustable.
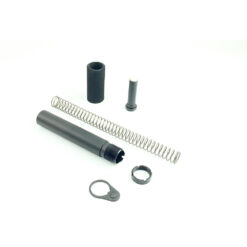
- Buffer Tube: The buffer tube houses the buffer and recoil spring, which help manage recoil and control the cycling of the firearm.
- Pistol Grip: The pistol grip allows for a comfortable and secure hold on the lower receiver.
- Trigger: The trigger is a crucial part of the fire control group and initiates the firing process when pulled.
- Magazine: The magazine holds ammunition and is inserted into the mag well of the lower receiver.
- Sights and Optics: These are essential for aiming and can be iron sights, red dot sights, scopes, or other types of optics.
By understanding these fundamental components, you'll need to select the correct parts for your AR-15 build and troubleshoot any issues that may arise during the assembly process. Building an AR-15 offers a rewarding and customizable experience, making it popular among firearm enthusiasts, sport shooters, and those seeking a reliable self-defense option. Safety is paramount, so always follow proper guidelines and manufacturer's instructions when assembling and handling firearms.
Essential Tools and Safety Precautions
Before assembling your AR-15, gathering the essential tools and prioritizing safety throughout the process is crucial. Equipping yourself with the right tools and following safety precautions ensures a successful and accident-free build.
Essential Tools:
- Armorers' Wrench: This multi-purpose tool helps tighten barrel nuts, castle nuts, and flash hiders.
- Punch Set: A set of pin punches is essential for driving in roll pins and other small components.
- Torque Wrench: To achieve proper torque, A torque wrench is indispensable to attain adequate torque specifications, such as the barrel nut.
- Vise and Vise Block: A vise provides a stable platform to work on your AR-15, and a vise block holds the upper receiver securely during assembly.
- Pivot and Roll Pin Installation Tool: These specialized tools simplify the installation of pivot and takedown pins.
- Screwdriver Set: A set of quality screwdrivers with various tips is necessary for attaching grips, handguards, and other components.
- AR-15 Armorer's Master Kit: Consider investing in a comprehensive armorer kit containing various specialized AR-15 assembly and maintenance tools.
- Safety Equipment: Wear safety glasses and ear protection throughout the assembly process to protect yourself from potential hazards.
Safety Precautions:
- Clear Workspace: Ensure you have a clean and clutter-free workspace to avoid losing small parts or tools.
- Unloaded Firearm: Always treat the AR-15 as if loaded, and ensure it is unloaded before beginning assembly.
- Read the Manual: Familiarize yourself with the manufacturer's instructions and guidelines for assembling your specific AR-15 model.
- Double-check everything: Before proceeding to the next step, verify that each component is installed and secured.
- Proper Torque: A torque wrench tightens critical components to the manufacturer's recommended torque specifications.
- Avoid Using Excessive Force: Applying excessive force can damage components or cause misalignment. Take your time and work carefully.
- Keep Ammunition Away: Store ammunition in a separate location, away from your assembly area.
- Proper Disposal: Responsibly dispose of packaging materials, plastic bags, or excess materials.
By adhering to these safety precautions and having the necessary tools, you'll be better equipped to build your AR-15 safely and efficiently. Remember, patience and attention to detail are vital for a successful assembly, resulting in a firearm that performs reliably and meets your expectations.
Step 1: Installing the Lower Receiver
The lower receiver serves as the foundation of your AR-15 build. Follow these steps to correctly install the components and ensure a solid base for the rest of the assembly:
- Gather Your Tools: Before you start, please ensure you have the necessary tools, including a pivot pin installation tool, roll pin punches, and a mallet.
- Prepare the Lower Receiver: Clear the lower receiver of debris or oil. Please check that the fire control group pocket is clean and smooth.
- Install the Trigger: Carefully insert the trigger into the receiver's fire control group pocket, ensuring it sits flush.
- Add the Hammer: Position the hammer above the trigger and align it correctly. You can insert the hammer pin and use the mallet to tap it into place.
- Attach the Pistol Grip: Align the grip's screw hole with the threaded hole in the receiver. Secure the grip using the provided screw.
- Install the Safety Selector: Insert the safety selector into the receiver, ensuring the detent spring and ball are in place. Could you rotate the selector to ensure smooth operation?
- Add the Trigger Guard: Align the trigger guard with the receiver and secure it using roll pins and a pin punch.
- Insert the Pivot Pin: Use the pivot pin installation tool to insert the pivot pin into the designated hole, ensuring it's fully seated.
- Install the Buffer Tube: Slide the buffer tube into the receiver's rear end, aligning it with the designated hole. Secure it using the castle nut and a castle nut wrench.
- Attach the Stock: Slide the stock onto the buffer tube and secure it, ensuring it's properly aligned and tightened.
- Insert the Takedown Pin: Use the pivot pin installation tool to insert the takedown pin into its respective hole, ensuring it's fully seated.
- Function Check: Before proceeding, you can perform a function check to ensure that the selector, trigger, and hammer operate correctly.
By completing Step 1 with precision and attention to detail, you'll have a solid lower receiver assembly, providing the basis for the subsequent steps of your AR-15 build. Remember, take your time, follow the manufacturer's instructions, and double-check each component's alignment and installation. An adequately installed lower receiver sets the stage for a reliable and accurate AR-15 rifle.
Step 2: Attaching the Upper Receiver
Attaching the upper receiver to the lower receiver is critical in assembling your AR-15. Follow these steps carefully to ensure a secure and functional connection:
- Prepare the Upper Receiver: Clear the upper receiver of any debris or oil. Please make sure the inside is clean and free from any obstructions.
- Check the Alignment: With the lower receiver on a stable surface, verify that the takedown and pivot pins align correctly with the corresponding holes in the upper receiver.
- Insert the Takedown Pin: Slide the takedown pin through the hole in the lower receiver and align it with the hole in the upper receiver. Please make sure it's fully seated.
- Attach the Pivot Pin: Insert the pivot pin through the lower receiver, aligning it with the pivot pinhole on the upper receiver. Could you push it until it clicks into place?
- Secure the Receiver: Push the upper and lower receivers together with the takedown and pivot pins in place until they form a snug fit.
- Install the Front Takedown Pin: Use the pivot pin installation tool to push the front takedown pin through the front of the lower receiver until it's fully seated.
- Check the Fit: Ensure the upper and lower receivers fit tightly together without wobbling or movement.
- Function Check: Perform another function check to verify that the safety selector, trigger, and hammer operate smoothly and correctly.
- Attach the Charging Handle: Insert the charging handle into the rear of the upper receiver and slide it forward until it's fully seated.
- Install the Bolt Carrier Group (BCG): Pull the charging handle back slightly to access the upper receiver's chamber. Could you slide the BCG into the upper receiver, ensuring it fits correctly on the charging handle?
- Close the Upper Receiver: Push the charging handle forward to close the upper receiver and secure the BCG.
- Function Test: Perform a final function test, ensuring the BCG moves freely and the rifle's action cycles smoothly.
By completing Step 2 successfully, you'll securely attach the upper receiver to the lower receiver, creating a functional AR-15 platform. Remember to maintain cleanliness throughout the assembly process and conduct function tests at each stage to catch any issues early on. With the upper and lower receivers assembled, you're one step closer to having a fully operational AR-15 rifle.
StepStep 3: Installing the Barrel and Gas System
Installing the barrel and gas system is crucial in your AR-15 assembly. This process requires precision to ensure proper alignment and functionality. Follow these steps carefully:
- Prepare the Upper Receiver: Ensure the upper receiver is clear of debris and adequately supported in a vise or an upper receiver vise block.
- Install the Barrel: Carefully slide the barrel into the front of the upper receiver. Could you align the barrel extension with the corresponding slot in the upper receiver?
- Torque the Barrel Nut: Thread the barrel nut onto the upper receiver, and use an armorer's wrench and torque wrench to tighten it to the manufacturer's recommended torque specification. This step is critical for proper alignment and head spacing.
- Install the Gas Tube: Slide the gas tube into the gas port on the barrel and the gas key on the BCG. Please make sure it's properly aligned and secured.
- Gas Block Installation: Slide the gas block onto the barrel and position it correctly, aligning it with the gas port. Use set screws or a gas block roll pin to secure it.
- Gas Tube Alignment: Verify that the gas tube is centered within the gas block and the gas key to allow for smooth gas flow.
- Attach the Handguard: If using a free-floating handguard, slide it over the barrel nut and align it with the upper receiver. You can secure it using the mounting system or barrel nut provided.
- Attach the Muzzle Device: Thread the muzzle device onto the barrel's threaded end, ensuring it's properly aligned and tight.
- Function Check: Perform a check to ensure the gas system operates correctly, cycling the BCG smoothly.
- Inspect for Alignment: Verify that the handguard, gas block, and muzzle device are aligned with the upper receiver and barrel.
- Safety Check: Ensure the gas block doesn't interfere with the gas tube, handguard, and suctions or sharp edges.
- Final Inspection: Double-check all components for proper alignment and tightness before proceeding to the next step.
By completing Step 3, you'll have installed the barrel and gas system, essential components that contribute to the AR-15's functionality and accuracy. Precise alignment and torquing of the barrel nut are critical for optimal performance. Always refer to the manufacturer's instructions and guidelines during the assembly process, and remember to conduct thorough function tests before moving on to subsequent steps.
Step 4: Installing the Handguard and Gas Tube
The handguard and gas tube installation is a significant step in your AR-15 assembly, providing a secure platform for accessories and ensuring proper gas flow. Follow these steps to install the handguard and gas tube successfully:
- Prepare the Upper Receiver: Ensure the upper receiver and barrel assembly from Step 3 are clear of debris and adequately supported in a vise or upper receiver vise block.
- Position the Handguard: Place the handguard over the barrel nut and align it with the upper receiver. If using a free-floating handguard, please ensure it doesn't touch the barrel and remains securely mounted.
- Secure the Handguard: Follow the manufacturer's instructions for your specific handguard model. This may involve tightening screws, a locking system, or a proprietary mounting mechanism.
- Install the Gas Tube: Carefully guide the gas tube through the hole in the handguard and into the gas block. Please make sure it's properly aligned and fully seated.
- Check for Clearance: Confirm that the handguard doesn't interfere with the gas tube or impede its movement during operation.
- Torque the Handguard: If applicable, torque the handguard mounting screws or barrel nut according to the manufacturer's recommended specifications.
- Attach Accessories: With the handguard in place, you can now attach various accessories such as rails, foregrips, bipods, or optics to enhance the functionality of your AR-15.
- Function Check: Perform a function check to verify that the gas tube remains adequately aligned and unobstructed as you manipulate the rifle.
- Inspect for Proper Fit: Double-check that the handguard is secure and doesn't wobble or shift. Please make sure all accessories are correctly attached.
- Final Inspection: Conduct a thorough inspection of the handguard, gas tube, and accessories to ensure everything is in place and properly aligned.
By completing Step 4 diligently, you'll have successfully installed the handguard and gas tube, providing a stable platform for attaching accessories and enhancing the versatility of your AR-15. Please pay attention to the manufacturer's instructions and guidelines for installing the handguard properly, as it directly impacts the accuracy and stability of your rifle. After each significant step, you can conduct function tests to ensure your AR-15 runs optimally and safely.
Step 5: Adding the Bolt Carrier Group
The bolt carrier group (BCG) is a critical component responsible for the proper functioning of your AR-15. Adding the BCG correctly ensures reliable cycling and firing. Follow these steps to install the BCG:
- Safety Check: Ensure your AR-15 is unloaded and the safety selector is engaged.
- Prepare the Upper Receiver: Place the upper receiver in a secure or upper receiver vise block.
- Inspect the BCG: Check the BCG for any debris or excess oil. Please make sure the gas key is properly staked to prevent loosening during use.
- Insert the BCG: Pull the charging handle back to open the upper receiver's chamber. Please carefully slide the BCG into the upper receiver, ensuring it fits correctly onto the charging handle.
- Close the Upper Receiver: Push the charging handle forward to close the upper receiver. Could you ensure the BCG is fully seated and aligned with the barrel extension?
- Check the Bolt: With the BCG closed, visually inspect the bolt through the ejection port to verify that it's fully rotated and locked.
- Function Test: Perform a function check, cycling the BCG manually to ensure it moves smoothly and locks securely.
- Check for Proper Staking: If your BCG has a gas key, confirm it's securely staked to prevent movement.
- Lubrication: Apply a light coat of firearm lubricant to the BCG, focusing on the bolt and carrier rails.
- Inspect Gas Rings: Ensure the gas rings on the bolt are correctly aligned and in good condition.
- Reinstall Charging Handle: If removed during the BCG installation, reinsert the charging handle and make sure it's secure.
- Function Test: Perform another function test to double-check the BCG's operation and ensure it cycles smoothly.
By completing Step 5, you've installed the bolt carrier group correctly, a vital part of the AR-15's operation. The BCG's proper functioning and reliability are crucial for safe and accurate shooting. Please make sure the safety selector is engaged and perform regular ma. Remember to clean the BCG to keep your AR-15 in the best. Remember to perform function tests after each significant assembly step to identify and address issues early.
Step 6: Installing the Charging Handle and Forward Assist
Installing the charging handle and forward assist finalizes the upper receiver assembly, enabling smooth manipulation and enhancing functionality. Follow these steps to install these components properly:
- Prepare the Upper Receiver: Ensure the upper receiver and bolt carrier group (BCG) from Step 5 are clear of debris and adequately supported in a vise or upper receiver vise block.
- Install the Charging Handle: Slide the charging handle into the rear of the upper receiver until it aligns with the BCG. Could you push it forward to engage the BCG's channel properly?
- Check Functionality: Manually cycle the charging handle back and forth to verify its smooth operation and ensure it locks securely in the forward position.
- Insert the Forward Assist: Position the forward assist onto the upper receiver's forward assist housing. Could you align the splines on the forward assist with the corresponding notches on the upper receiver?
- Secure the Forward Assist: Use a punch to push the forward assist retaining pin into place, securing the forward assist to the upper receiver.
- Check Engagement: Press the forward assist button to ensure it engages smoothly with the BCG when needed.
- Function Test: Perform a function test, cycling the charging handle and forward assist to ensure they operate correctly.
- Safety Check: Double-check that the safety selector is engaged and the rifle is unloaded before proceeding.
- Lubrication: Apply a light coat of lubricant to the charging handle and forward assist components for smoother operation.
- Inspect for Proper Fit: Ensure the charging handle and forward assist are securely installed and don't wobble or shift.
- Final Inspection: Conduct a thorough inspection of the upper receiver, charging handle, and forward assist to ensure everything is in place and functioning as expected.
By completing Step 6 meticulously, you've successfully installed the charging handle and forward assist, essential components that contribute to the upper receiver's functionality. The charging handle allows for manual cycling of the bolt carrier group, while the forward assist assists in seating a stubborn round in the chamber. Ensure the safety selector is engaged and perform regular maintenance and lubrication to keep your AR-15 in optimal condition. Remember to perform function tests after each significant assembly step to identify and address issues early.
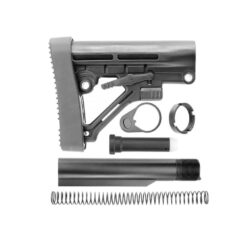
Step 7: Adding the Buffer Tube and Stock
The buffer tube and stock assembly are vital components that provide stability, control recoil, and allow for the proper firing of your AR-15. Follow these steps to install the buffer tube and stock:
- Safety Check: Ensure your AR-15 is unloaded and the safety selector is engaged.
- Prepare the Lower Receiver: Place the lower receiver in a vise or use a lower receiver vise block for stability.
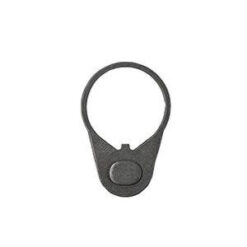
- Install the Buffer Tube: Slide the buffer tube into the designated receiver extension hole at the rear of the lower receiver. Please make sure the tube's end plate lines up with the lower receiver's end plate.
- Secure the Buffer Tube: Tighten the castle nut onto the buffer tube until snug using a castle nut wrench. Align the castle nut's notches to accommodate the receiver extension plate.
- Torque the Castle Nut: Using a torque wrench, torque the castle nut to the manufacturer's recommended specification. This is critical to prevent loosening during firing.
- Install the End Plate and Buffer Retainer: Insert the end plate onto the buffer tube, ensuring it aligns with the castle nut's notches. If your lower receiver has a buffer retainer, could you also position it?
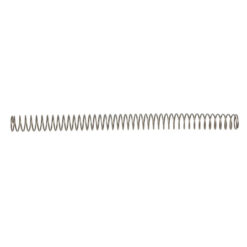
- Add the Buffer and Spring: Insert the buffer spring into the buffer tube, followed by the buffer itself. Could you make sure they fit securely and do not bind?
- Install the Stock: Slide the stock onto the buffer tube until it aligns with the lower receiver. You can use the provided adjustment mechanism or securing method to ensure a snug fit, depending on the type of stock.
- Check Stock Adjustment: If your stock is adjustable, verify it locks firmly into various positions.
- Function Test: Perform a function test, cycling the charging handle and trigger to ensure proper engagement and operation.
- Safety Check: Double-check that the safety selector is engaged and the rifle is unloaded before proceeding.
- Inspect for Proper Fit: Ensure the buffer tube and stock assembly are securely installed without wobbling or excessive movement.
- Final Inspection: Conduct a thorough inspection of the buffer tube, stock, and lower receiver to ensure everything is in place and functioning correctly.
By completing Step 7, you've assembled the buffer tube and stock, critical components that contribute to the comfort and control of your AR-15. The buffer tube absorbs recoil, enhancing shooting stability, while the stock allows for a personalized length of pull. Please ensure the safety selector is engaged and perform regular maintenance and lubrication to keep your AR-15 in the best condition. Remember to perform function tests after each significant assembly step to identify and address issues early.
Step 8: Installing the Trigger Group
Installing the trigger group is a significant step in assembling your AR-15, as it directly influences the rifle's accuracy and shooting performance. Follow these steps carefully to install the trigger group properly:
- Safety Check: Ensure your AR-15 is unloaded and the safety selector is engaged.
- Prepare the Lower Receiver: Place the lower receiver in a vise or use a lower receiver vise block for stability.
- Disassemble the Lower Receiver: If you haven't already, remove the pistol grip and the stock from the lower receiver to access the trigger group area.
- Position the Hammer and Trigger Pins: Insert the hammer and trigger pins into their respective holes on the lower receiver, ensuring they are oriented correctly.
- Install the Trigger: Carefully lower the trigger into the receiver's fire control group pocket. Please ensure it sits flush and aligns with the hammer and trigger pins.
- Install the Hammer: Position the hammer above the trigger, ensuring it engages properly. You can insert the hammer pin and use a mallet to tap it into place.
- Attach the Trigger Spring and Disconnector: Install the trigger spring and disconnector into their appropriate positions on the trigger.
- Install the Hammer Spring: Place the hammer spring into the receiver, ensuring it fits properly onto the trigger and hammer pins.
- Install the Disconnect Spring: Install the disconnect spring onto the disconnector, ensuring it engages correctly with the trigger.
- Reinstall the Pistol Grip: Reattach the pistol grip securely to the lower receiver once the trigger group is in place.
- Reinstall the Stock: Slide the stock back onto the buffer tube and align it with the lower receiver. Secure the stock, ensuring it's snug and aligned.
- Function Test: Perform a function test by checking the safety selector, trigger pull, and hammer release. Please make sure the trigger group operates smoothly and safely.
- Safety Check: Double-check that the safety selector is engaged and the rifle is unloaded before proceeding.
- Inspect for Proper Fit: Ensure the trigger group components are securely installed and function correctly without any binding.
- Final Inspection: Conduct a thorough inspection of the trigger group and lower receiver to ensure everything is in place and functioning as expected.
By completing Step 8, you've installed the trigger group, a crucial component directly affecting your AR-15's shooting performance. The trigger's smooth operation and proper alignment with the hammer are essential for accurate and consistent shooting. Please ensure the safety selector is engaged and perform regular maintenance and cleaning of the trigger group to keep your AR-15 in the best condition. Remember to perform function tests after each significant assembly step to identify and address issues early. Step
Step 9: Adding the Pistol Grip
The pistol grip is critical to your AR-15's ergonomics, providing a comfortable and secure hold while shooting. Follow these steps to add the pistol grip to your lower receiver correctly:
- Safety Check: Ensure your AR-15 is unloaded and the safety selector is engaged.
- Prepare the Lower Receiver: If you haven't already, place the lower receiver in a vise or use a lower receiver vise block for stability.
- Remove the Old Pistol Grip: If an existing pistol grip exists, unscrew it from the lower receiver using an appropriate screwdriver or Allen wrench.
- Inspect the Pistol Grip: Check the new pistol grip for debris or excess material. Ensure all parts, such as the grip screw and washer, are included.
- Insert the Pistol Grip Screw: Slide the pistol grip onto the lower receiver, aligning the screw hole with the threaded hole in the grip's base.
- Add the Washer (If Applicable): Some pistol grips come with a washer to prevent over-tightening of the grip screw. Place the washer over the screw hole on the pistol grip.
- Tighten the Grip Screw: Insert the grip screw into the threaded hole in the lower receiver and pistol grip. Use an appropriate screwdriver or Allen wrench to tighten the screw securely.
- Check the Fit: Ensure the pistol grip is snugly attached to the lower receiver and doesn't wobble or shift.
- Inspect the Safety Selector: Verify that the safety selector moves smoothly and doesn't interfere with the pistol grip.
- Function Test: Perform a function test by engaging and disengaging the safety selector to ensure it operates correctly with the new pistol grip.
- Safety Check: Double-check that the safety selector is engaged and the rifle is unloaded before proceeding.
- Final Inspection: Conduct a thorough inspection of the pistol grip and lower receiver to ensure everything is in place and functioning as expected.
By completing Step 9, you've added the pistol grip, a critical component that enhances the ergonomics and shooting comfort of your AR-15. The pistol grip's proper installation ensures a secure and comfortable hold while shooting, contributing to better control and accuracy. Please confirm the safety selector is engaged and regularly maintains and cleans the pistol grip to keep your AR-15 in the best condition. Remember to perform function tests after each significant assembly step to identify and address issues early.
Step 10: Installing the Handguard Accessories
Step 10 involves adding accessories to your AR-15's handguard with the handguard securely in place. Handguard accessories allow you to customize your rifle according to your shooting preferences and needs. Follow these steps to install various accessories onto the handguard:
- Safety Check: Ensure your AR-15 is unloaded and the safety selector is engaged.
- Prepare the Rifle: Place your AR-15 on a stable surface or use a gun vise to keep it secure during the installation.
- Identify Accessory Mounting Points: Examine the handguard for the mounting points, typically equipped with Picatinny or M-LOK rail sections.
- Select Your Accessories: Choose the accessories you want to install, such as vertical grips, bipods, flashlights, laser sights, or other attachments compatible with your handguard's mounting system.
- Attach Picatinny Accessories: For Picatinny rail-mounted accessories, slide the accessory onto the corresponding rail section and secure it using the provided screws or mounting hardware. Ensure the addition is tightly fixed to prevent movement during shooting.
- Mount M-LOK Accessories: For M-LOK compatible accessories, align the accessory's mounting lugs with the Handguard slots. Insert the appropriate screws or nuts and tighten them securely to attach the accessory.
- Check for Proper Fit: Verify that the accessories are securely attached to the handguard and do not wobble or shift.
- Function Test: Perform a function test by gripping and manipulating the rifle to ensure the accessories do not interfere with your shooting stance or handling.
- Safety Check: Double-check that the safety selector is engaged and the rifle is unloaded before proceeding.
- Final Inspection: Conduct a thorough inspection of the handguard accessories and the overall rifle to ensure everything is in place and functioning as expected.
By completing Step 10, you've customized your AR-15 by adding various accessories to the handguard. Accessorizing your rifle allows you to tailor it to your shooting style and specific requirements, enhancing its versatility and performance. Please ensure the safety selector is engaged and perform regular maintenance and inspection of the accessories to keep your AR-15 in the best condition. Remember to perform function tests after each significant assembly step to identify and address issues early.
Function Check and Final Safety Tips
After completing all the assembly steps for your AR-15, performing a thorough function check is crucial to ensure the rifle operates safely and reliably. Additionally, here are some final safety tips to keep in mind:
Function Check:
- Safety Check: Ensure your AR-15 is unloaded and the safety selector is engaged.
- Charging Handle: Cycle the charging handle back and forth to confirm it moves smoothly and locks securely in the forward position.
- Trigger Check: Engage the safety selector to "Fire" and perform a trigger pull test. Could you verify that the trigger releases the hammer and that the hammer resets properly after releasing the trigger?
- Bolt Carrier Group (BCG) Function: With the safety selector on "Fire," manually cycle the BCG by pulling the charging handle. Please confirm that the BCG moves smoothly, locks into the upper receiver, and returns to the forward position.
- Safety Function: Engage the safety selector to "Safe" and ensure the trigger is blocked, preventing it from releasing the hammer.
Final Safety Tips:
- Safe Storage: Store your AR-15 in a secure and locked location, away from unauthorized access, especially if children or inexperienced individuals are in your household.
- Regular Maintenance: Perform routine maintenance, cleaning, and inspection to keep your AR-15 in optimal condition and identify potential issues early on.
- Ammunition: Always use the correct caliber and quality ammunition that matches your AR-15's specifications.
- Eye and Ear Protection: Always wear appropriate eye and ear protection when shooting your AR-15 or handling firearms.
- Familiarity and Training: Familiarize yourself with your AR-15's operation, and seek professional training to learn proper shooting techniques and firearm handling.
- Follow Local Laws: Comply with all local, state, and federal laws and regulations regarding firearm ownership, transportation, and use.
- Avoid Modifications: Refrain from making unauthorized or unsafe modifications to your AR-15 that may compromise its safety and functionality.
- Mind Your Target and Beyond: Always be aware of your target and what lies beyond it to prevent accidental injury to others.
Remember that assembling and using an AR-15 requires responsibility, knowledge, and adherence to safety protocols. If you're unsure about any aspect of the assembly process or firearm handling, seek guidance from a qualified firearms instructor or gunsmith. By prioritizing safety and responsible firearm ownership, you can enjoy the rewarding experience of owning and using an AR-15 responsibly.
Troubleshooting and Common Mistakes
Even with careful assembly, AR-15s can encounter issues that require troubleshooting. Here are some common problems you may encounter and tips for identifying and fixing them:
1. Failure to Fire:
- Check if the safety selector is on "Safe" or if the hammer is not adequately cocked.
- Ensure the bolt is entirely in the battery and the chamber is clear of obstructions.
- Verify that you're using the correct ammunition for your AR-15's chamber.
- Inspect the firing pin, bolt, and hammer for wear or damage.
2. Failure to Eject or Extract:
- Clean and lubricate the bolt and BCG to ensure smooth movement.
- Inspect the extractor for wear or damage and replace it if necessary.
- Check for carbon buildup or fouling in the chamber and clean as needed.
3. Double Feeds or Failures to Feed:
- Check for magazine issues, such as damaged feed lips or springs.
- Verify that the bolt is cycling smoothly and the gas system is functioning correctly.
- Inspect the chamber for signs of fouling or debris hindering the feeding process.
4. Trigger Issues:
- Ensure the trigger group is installed correctly and all pins are seated securely.
- Check for binding or obstruction in the trigger group and inspect the springs for proper alignment.
- Lubricate the trigger components if they feel gritty or stiff.
5. Excessive Recoil or Malfunctioning Gas System:
- Confirm that the gas block and tube are correctly aligned and secure.
- Inspect the gas key on the BCG for proper staking and secure mounting.
- Check for gas leaks or excess carbon buildup in the gas system.
6. Loose Components:
- Regularly inspect all screws, nuts, and pins to ensure they remain tight during use.
- Use thread-locking compounds on critical screws to prevent them from backing out.
:
- Over-Torquing: Applying excessive torque can damage components or strip threads. Always follow the manufacturer's torque specifications.
- Using Incorrect Parts: Ensure all parts are compatible with your AR-15's specific model and caliber.
- Skipping Function Tests: Always perform function tests after each assembly step to identify issues early on.
- Unsafe Handling: Always keep the firearm pointed in a safe direction, and keep your finger off the trigger until ready to shoot.
- Lack of Lubrication: Properly lubricate moving parts to reduce friction and prevent premature wear.
- Incorrect Assembly Order: Follow the instructions correctly to avoid unnecessary disassembly and reassembly.
- Ignoring Safety Guidelines: Always follow firearm safety guidelines and use appropriate safety gear when assembling, handling, and shooting your AR-15.
Remember, if you encounter persistent issues or are unsure about troubleshooting, seek assistance from a qualified gunsmith or expert. Safe and responsible firearm ownership includes understanding your weapon, performing regular maintenance, and addressing problems promptly to ensure your AR-15 performs reliably and safely.
Cleaning and Maintenance of Your AR-15
Regular cleaning and maintenance are essential to keep your AR-15 in optimal condition, ensure reliable performance, and extend its lifespan. Here's a step-by-step guide for cleaning and maintaining your AR-15:
1. Safety Check:
- Always perform a safety check to ensure your AR-15 is unloaded before beginning any cleaning or maintenance.
2. Disassembly:
- Separate the upper and lower receivers as outlined in your AR-15's owner's manual. Remove the bolt carrier group (BCG) and charging handle from the upper receiver.
3. Cleaning the Bore:
- Use a bore brush and cleaning rod to clean the barrel. Apply solvent to the bore brush and run it through the barrel several times. Then, use clean patches to remove fouling and excess solvent. Repeat until the patches come out clean.
4. Cleaning the BCG:
- Use a nylon brush and cleaning solvent to thoroughly clean the BCG, including the bolt, firing, and cam pin. Remove carbon buildup and fouling.
5. Cleaning the Upper Receiver:
- Use cotton swabs or brushes to clean the upper receiver's chamber, gas key, and other areas where carbon and fouling may accumulate.
6. Lubrication:
- Apply a light coat of lubricant to the BCG, focusing on the bolt and carrier rails. Lubricate other moving parts, such as the charging handle, pivot pins, and safety selector.
7. Cleaning the Lower Receiver:
- Use cotton swabs or brushes to clean the lower receiver's fire control group pocket, trigger, and hammer.
8. Inspect Components:
- Inspect all components for wear, damage, or signs of stress. Pay particular attention to the gas rings on the bolt and the springs in the trigger group. Replace any worn or damaged parts.
9. Reassembly:
- Reassemble the upper and lower receivers, ensuring all components are properly seated and secured.
10. Function Test:
- Perform a function test to verify that your AR-15 cycles smoothly and operates safely.
Regular Maintenance:
- Clean After Every Use: Clean your AR-15 after each shooting session to remove fouling and prevent corrosion.
- Check for Wear: Regularly inspect all components for signs of wear or damage. Please address any issues as soon as possible.
- Lubrication: Apply lubricant to moving parts regularly, but avoid over-lubrication, as excessive oil can attract dirt and debris.
- Storage: Store your AR-15 in a cool, dry place and use a gun-safe or secure storage container to prevent unauthorized access.
- Replace Springs and O-rings: Replace buffer springs and gas rings periodically to maintain optimal performance.
- Keep it Dry: Moisture can cause rust and corrosion, so ensure your AR-15 stays dry during use and storage.
By following these cleaning and maintenance guidelines, you'll keep your AR-15 in excellent condition, ensuring its reliability and longevity. Regular care and attention to detail will help you get the most out of your firearm and enjoy a safe and satisfying shooting experience.
Conclusion: Proudly Assembling Your AR-15
Congratulations! By successfully assembling your AR-15, you've achieved more than just putting together a firearm; you've embarked on a journey of craftsmanship and self-reliance. Building an AR-15 allows you to customize it to your preferences, making it a true reflection of your shooting style and needs.
Throughout less, you've learned valuable skills, from understanding the rifle's components to troubleshooting and maintenance. As a responsible gun owner, safety has been at the forefront of your mind, and your dedication to following guidelines ensures safe handling and operation.
Your AR-15 is more than just a tool; it represents a commitment to your passion for shooting and a sense of pride in your work. As you head to the range or field with your self-assembled AR-15, take pride that you built this firearm from the ground up – a testament to your dedication to responsible gun ownership and your love for shooting sports. Happy shooting!
Disclaimer
The information in this blog titled "How to Assemble an AR-15: A Step-by-Step Guide" is intended solely for educational and informational purposes. It is crucial to understand and comply with all federal, state, and local laws and regulations about firearms, including the assembly and possession of AR-15 rifles. Before attempting to assemble an AR-15 or any other gun, please ensure that you are fully aware of and in compliance with all applicable laws, restrictions, and regulations in your location.
This blog is intended for adult audiences only. If you are under 18 (or the majority in your jurisdiction), you must obtain parental or legal guardian consent before accessing this content. Additionally, responsible individuals of legal age should only conduct firearm assembly.
Your safety is of utmost importance. Assembling firearms, including the AR-15, requires proper knowledge, skill, and adherence to safety practices. Always prioritize safety when handling guns and strictly follow all manufacturer instructions and safety guidelines. If you lack experience or knowledge in firearm assembly, seek assistance from a qualified gunsmith or instructor.
This blog's creators, authors, and publishers cannot be held liable for any damages, injuries, or legal consequences resulting from the use, misuse, or reliance upon the information provided in this guide. By accessing this blog, you assume all risks associated with firearm assembly and usage and agree to hold us harmless from any claims, damages, or liabilities.
Please note that firearms laws and regulations are subject to change. The information presented in this blog may only somehow reflect the most current legal requirements in your jurisdiction, if you don't mind. Could you always verify the latest laws and restrictions before engaging in any firearm-related activities?
If you have any uncertainties or questions about firearm laws and regulations, we strongly advise consulting with a qualified legal professional in your area. This blog does not constitute legal advice, and we do not assume responsibility for any decisions based on the information presented here.
Remember, responsible firearm ownership is paramount. Always handle firearms safely, store them securely, and use them lawfully and responsibly.
By accessing and using the content provided in this blog, you agree to be bound by this disclaimer and all applicable laws and regulations. If you don't agree with any part of this disclaimer, please don't use the information presented here.
Recent Posts
-
Essential Guide to AR-15 Lower Parts Kits: What Every Builder Should Know
Selecting the right AR-15 lower parts kit is one of the most critical steps in building or …Dec 24th 2024 -
Common Issues with AR-15 Barrel Installation and How to Fix Them
Installing a barrel on an AR-15 is crucial in building or upgrading your rifle. While it may seem …Dec 22nd 2024 -
Understanding 1 MOA vs. 3 MOA vs. 6 MOA: Choosing the Right Red Dot Size for Your AR-15
The MOA dot size is one of the most important considerations when choosing a red dot sight for y …Dec 21st 2024