How to Install an AR-15 Lower Parts Kit: A Complete Guide for Beginners
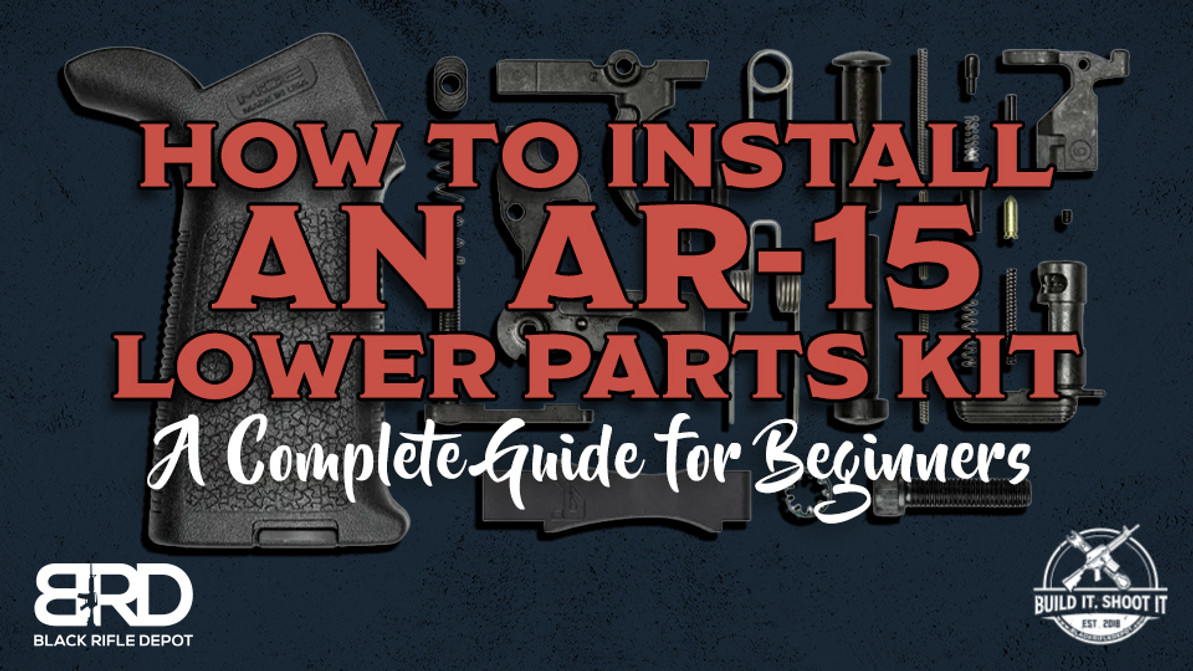
This how-to guide assists in installing an AR-15 lower parts kit, also known as an LPK, providing the necessary steps and tools for a successful assembly. An AR-15 lower parts kit is a collection of essential components needed to complete the lower receiver of an AR-15 rifle. These kits typically include the trigger assembly, safety selector, magazine release, bolt catch, and various pins and springs. The lower receiver houses the trigger mechanism and magazine well, making its assembly crucial for a functional AR-15.
The lower parts kit is vital to the rifle's functionality and offers significant customization potential. By selecting the best AR-15 lower parts kit, builders can tailor the firearm to their needs, enhancing ergonomics and performance. Having a spare AR-15 lower parts kit is also beneficial for quick repairs.
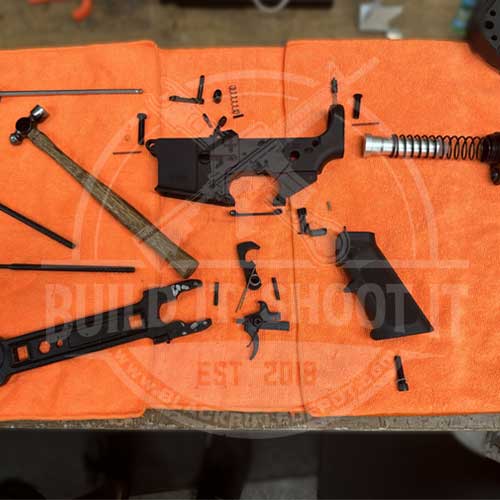
Essential tools for assembly include an armorer's wrench, punch set, hammer, and vise block. These tools ensure proper installation and prevent damage. This guide will give you the knowledge and confidence to assemble your AR-15 lower receiver effectively and safely.
Gather Your Tools and Components
Assembling an AR-15 lower receiver requires a specific set of tools and components to ensure a smooth and successful build. Essential tools include an armorer's wrench, punch set, hammer, and vise block. These tools are crucial for manipulating and securing the various small parts involved in the assembly. The armorer's wrench is handy for tightening the buffer tube and castle nut, while the punch set and hammer are necessary for driving pins into place. A vise block helps stabilize the lower receiver during assembly, preventing damage and ensuring precise work. A set of needle nose pliers, roll pin punches, and a small rubber mallet can be very helpful.
A typical AR-15 Lower kit includes the lower receiver, buffer tube assembly, and lower parts kit. The lower parts kit consists of critical pieces such as the trigger assembly, safety selector, magazine release, bolt catch, and various pins and springs. These components are integral to the rifle's function and operation, and each must be installed correctly to ensure proper performance.
Prepare Your Workspace
Preparing your workspace is a crucial step in assembling your AR-15 lower receiver. Choosing a well-lit and spacious area to work in is essential for several reasons. Adequate lighting ensures you can see the small parts and intricate details involved in the assembly process, reducing the likelihood of mistakes. A spacious area provides enough room to organize your tools and components, making the assembly process more efficient and less cluttered.
Consider using a mat or a soft cloth to protect the receiver from scratches. The lower receiver is a critical component of the AR-15, and any damage can affect your rifle's overall function and aesthetics. A protective mat or cloth provides a cushioned surface that minimizes the risk of scratches or dents while you work. Additionally, a non-slip mat can help keep parts from rolling away or getting lost, which is especially important when dealing with small pins and springs.
Organizing your tools and components before you begin is also beneficial. Please lay out all the parts from your lower parts kit and ensure you have all the necessary tools within easy reach. This preparation can save you time and frustration during the assembly process. Keeping a clean and tidy workspace also helps maintain focus and reduces the chances of losing small parts. Overall, a well-prepared workspace contributes to a smoother, more enjoyable assembly experience and a better-quality finished product.
Preparing Your Lower Receiver
Properly preparing the AR-15 lower receiver is crucial in assembling or upgrading your AR-15. Whether installing new lower parts or upgrading an existing lower parts kit, starting with a well-prepared lower receiver is essential for a successful build.
If you are upgrading an existing lower parts kit, begin by disassembling the lower receiver. Ensure the firearm is unloaded, which is the most critical safety precaution. Remove the magazine and check the chamber to confirm it is empty. Safety glasses are recommended to protect your eyes from small parts that might spring loose during disassembly. Place the AR-15 on a stable surface and identify the takedown pins at the lower receiver's front and rear. Push the rear takedown pin from left to right using your fingers or a punch tool until fully extended. The upper receiver will hinge open, allowing access to the internal components. Next, push the front takedown pin in the same manner to completely detach the upper receiver from the lower receiver.
With the upper receiver removed, focus on the lower receiver. Take note of the internal parts, such as the buffer tube, buffer spring, and various small pins and springs. Handle these parts carefully to avoid losing any components. Use a clean, organized workspace to keep track of all parts and tools. Maintaining a systematic approach throughout the disassembly process by placing small parts in containers or on a magnetic tray will make the subsequent assembly process more straightforward and efficient. Always follow manufacturer guidelines and consult your AR-15’s manual for specific instructions for your model.
Preparing the lower receiver properly sets the foundation for a successful build or upgrade. By ensuring your workspace is organized, and all components are accounted for, you can smoothly transition to assembling the new lower parts kit. This preparation provides the reliability and functionality of your AR-15, whether you are starting fresh or enhancing an existing setup. Prioritizing these steps will help you build and use your AR-15 safely and responsibly.
Installing The Lower Parts Kit
Installing the best AR-15 lower parts kit in your rifle lower receiver is a meticulous process that requires patience and precision. Here’s a step-by-step guide to installing the primary components:
Trigger Assembly:
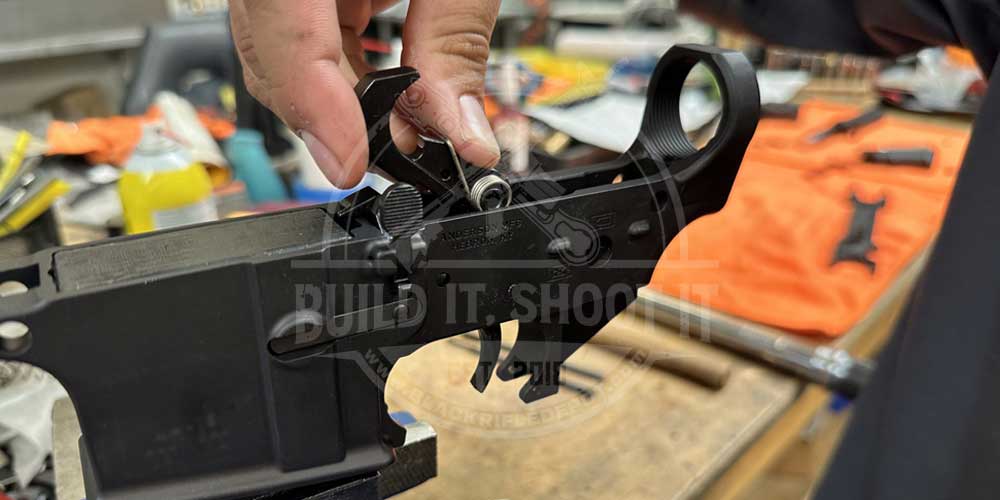
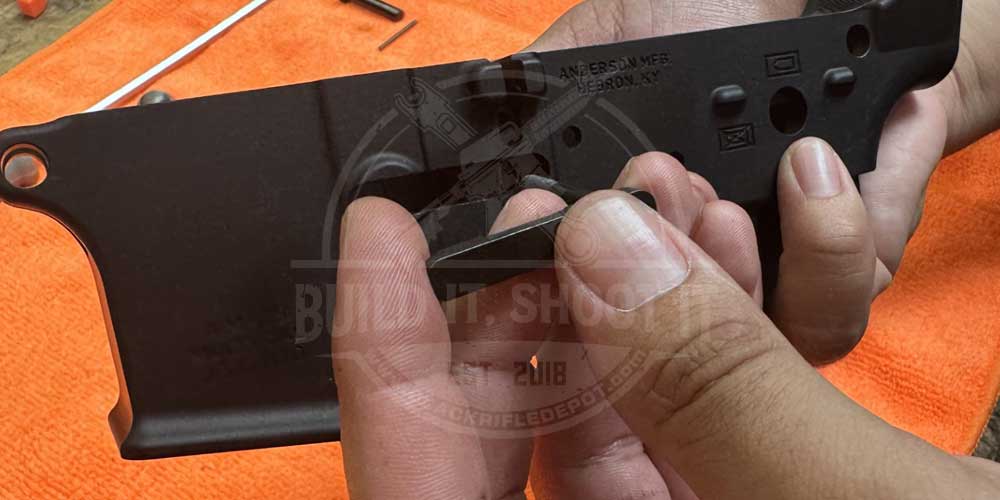
- Begin by installing the trigger and hammer. Place the trigger into the lower receiver, ensuring the trigger spring is correctly positioned.
- Insert the trigger pin through the lower receiver and trigger assembly. If necessary, you can use a punch tool to align the holes.
- Install the hammer next, ensuring the hammer spring legs rest correctly on the trigger pin. Could you insert the hammer pin to secure it?
Safety Selector:
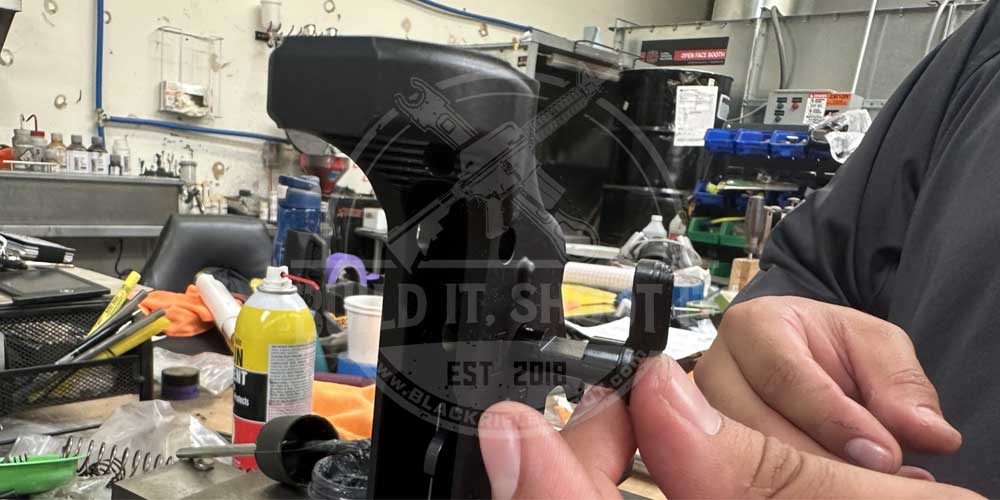
- With the trigger assembly installed, insert the safety selector through the side of the lower receiver.
- Position the detent and spring in their respective holes and secure them with the pistol grip screw.
- Ensure the safety selector operates smoothly between the “safe” and “fire” positions.
Magazine Release:
- Insert the magazine catch through the magazine well on the lower receiver.
- Place the magazine catch spring over the threaded end of the catch inside the lower receiver.
- Screw the magazine release button onto the threaded end, compressing the spring. Please press the button and rotate the catch to secure it.
Bolt Catch:
- Place the bolt catch spring and plunger into their holes on the lower receiver.
- Align the bolt catch over the spring and plunger.
- Insert the bolt catch roll pin partially, then use a punch to drive it fully while ensuring the bolt catch remains aligned.
Additional Components:
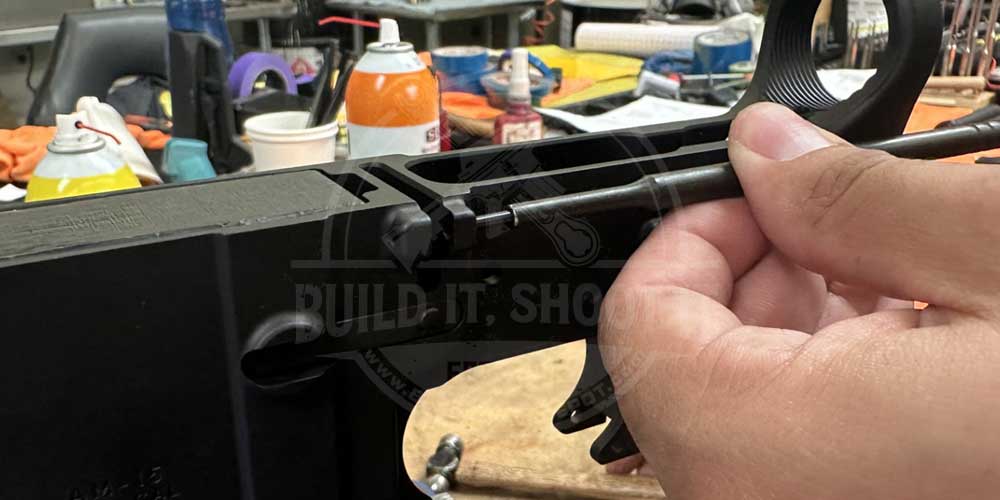
- Install the pivot pin by inserting the spring and detent into the lower receiver, then compress and insert the pivot pin.
- For the takedown pin, follow a similar process, ensuring the detent and spring are correctly positioned before securing the pin.
Tips for Aligning and Securing Pins:
- Use a punch tool to help align holes before inserting pins.
- Apply gentle pressure when driving pins to avoid damaging the lower receiver.
- Ensure all springs and detents are correctly positioned to prevent malfunction.
- Work slowly and methodically, double-checking each step to ensure proper alignment and secure installation.
Following these detailed steps and tips, you can ensure a precise and reliable installation of your AR-15 lower parts kit, resulting in a fully functional and customized firearm.
Installing The Buffer Tube Assembly
Installing the buffer tube assembly is crucial in completing your AR-15 lower receiver. The buffer tube, buffer spring, and buffer all play essential roles in the firearm's operation, ensuring smooth cycling and proper function.
Attaching the Buffer Tube:
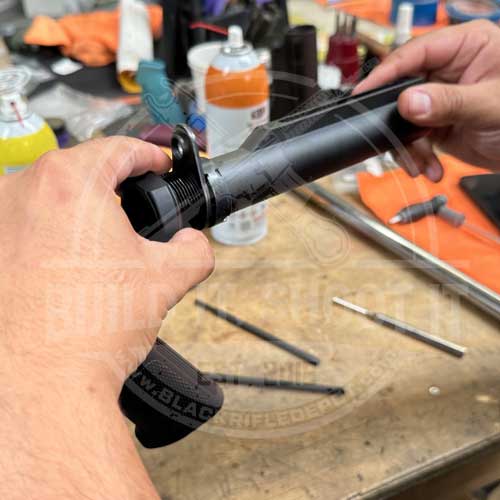
- Begin by threading the castle nut onto the buffer tube. Then, could you slide the end plate onto the buffer tube?
- Insert the buffer retainer spring and buffer retainer into their respective holes in the lower receiver.
- Carefully thread the buffer tube into the lower receiver. As you tighten the buffer tube, ensure it captures the buffer retainer and holds it in place. Continue threading until the buffer tube is nearly flush with the lower receiver.
- Align the end plate with the rear of the lower receiver and tighten the castle nut against it. You can use an armorer's wrench to firmly secure the castle nut, ensuring the end plate is aligned correctly and the buffer tube securely attached.
Function of the Buffer Spring and Buffer: The buffer spring and buffer are critical components that absorb the recoil force generated when firing the AR-15. The buffer spring fits inside the buffer tube, with the buffer placed at the end of the spring.
When a round is fired, the bolt carrier group (BCG) moves rearward, compressing the buffer spring. The buffer inside the buffer tube helps to slow and cushion this rearward movement, reducing felt recoil. After reaching full compression, the buffer spring pushes the BCG forward, chambering the next round and preparing the rifle for the next shot. This cyclical action is essential for the AR-15's semi-automatic operation.
Proper installation and function of the buffer tube assembly ensure reliable cycling, reduce recoil, and enhance the overall performance of your AR-15. These steps will help you achieve a smooth and efficient assembly, ensuring your rifle operates as intended.
Reassemble Your AR-15
After successfully assembling your AR-15 lower receiver and conducting necessary safety checks, it's time for you to reattach the upper receiver. This step ensures that your firearm is complete and ready for use. Reattaching the Upper Receiver:
- Instructions for Reattaching:
- Align the front pivot pin of the lower receiver with the corresponding hole in the upper receiver.
- Insert the front pivot pin and push it through until it locks into place.
- Close the upper receiver onto the lower receiver, ensuring the rear takedown pin holes are aligned.
- Push the rear takedown pin through the lower receiver and into the upper receiver until it locks.
- Ensuring Proper Alignment and Secure Attachment:
- Verify that the front pivot and rear takedown pins are fully seated and locked.
- Ensure there are no gaps between the upper and lower receivers.
- Check that the upper receiver pivots smoothly on the front pivot pin and locks securely with the rear takedown pin.
Final Checks:
- Double-Checking All Components:
- Verify the safety selector moves smoothly and functions correctly in both "safe" and "fire" positions.
- Confirm the trigger operates correctly with a clean break and proper reset.
- Check the magazine release to ensure it engages and releases the magazine smoothly.
- Final Inspection for Loose or Misaligned Parts:
- Inspect the rifle to ensure all pins, screws, and components are securely fastened.
- Look for any loose or misaligned parts that could affect the function or safety of the firearm.
- Perform a final function check by cycling the action and dry firing to ensure everything operates smoothly and correctly.
Test Functionality and Safety Checks
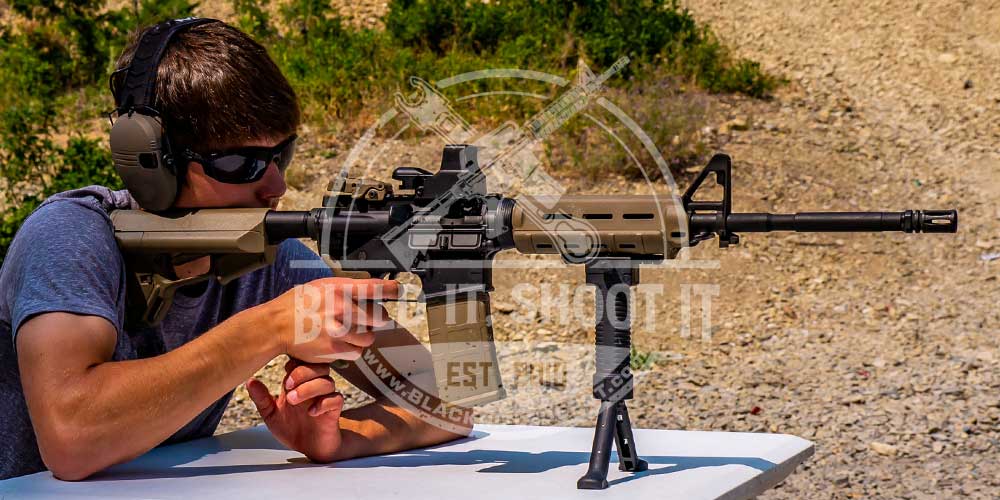
After assembling your AR-15 lower receiver, it's crucial to test its functionality and perform thorough safety checks to ensure all parts work correctly and the firearm is safe to use. These steps will help you identify potential issues and confirm that your assembly succeeded.
Functional Testing:
- Checking Trigger Reset and Safety Function:
- Ensure the rifle is unloaded by removing the magazine and checking the chamber.
- Cock the hammer by pulling back the charging handle and releasing it.
- Pull and hold the trigger; the hammer should release and strike the firing pin area.
- Cycle the action again by pulling back and releasing the charging handle while holding the trigger.
- Slowly release the trigger; you should hear a click, indicating the trigger has appropriately reset.
- Engage the safety selector to the "safe" position and attempt to pull the trigger. The trigger should not move, and the hammer should not release.
- Ensuring All Installed Parts Operate Smoothly:
- Check the movement of the safety selector, magazine release, and bolt catch to ensure they function correctly and smoothly.
Safety Checks:
- Importance of Thorough Safety Inspections:
- Performing safety checks ensures the firearm functions reliably and safely, preventing accidents and malfunctions.
- Step-by-Step Guide for Safety Checks:
- Verify the firearm is unloaded by removing the magazine and checking the chamber.
- Ensure the safety selector works correctly, preventing trigger movement when engaged.
- Check all installed parts for smooth operation and secure attachment.
- Inspect the buffer tube assembly, verifying it is correctly installed and that all springs and detents function as intended.
Following these functional and safety checks ensures that your AR-15 operates correctly and safely, providing confidence in its reliability and performance.
Conclusion
When building an AR-15, selecting a high-quality lower-parts kit ensures reliability and performance. Popular kits from manufacturers like the AERO Precision lower parts kit are excellent choices due to their quality and dependability.
While this guide provides a comprehensive overview, you may need additional training or assistance. For more information, check out our other blog on How to Build an AR-15.
Above all, firearm safety and compliance with local laws should always be prioritized. Adhering to safety protocols is essential to prevent accidents and ensure a safe shooting experience. Treat every firearm as if it's loaded, keep your finger off the trigger until ready to shoot, and always be aware of your target and what's beyond it. By following these guidelines and staying informed about local regulations, you can build and use your AR-15 safely and responsibly.
Recent Posts
-
Best AR-15 Handguards - MOE SL Handguard
In the world of AR-15 customization, handguards not only protect the barrel but are pivotal in enhan …Feb 5th 2025 -
Budget vs. Premium AR-15 Rifle Scopes: Are Expensive Optics Worth It?
When it comes to enhancing your AR-15's performance, selecting the right AR-15 rifle scope is crucia …Feb 2nd 2025 -
Top Lightweight Red Dot Sights for Minimalist AR-15 Builds
Choosing the right red dot sight for your AR-15 is more than just picking a well-known brand—i …Jan 30th 2025

