
AR-15 Stocks
How to Install An AR-15 Stock – A Step-by-Step Guide
Aug
Table of Contents
Installing a new AR-15 stock is usually much easier than many first-time owners expect. When your rifle already has a compatible carbine receiver extension, commonly called a buffer tube, most adjustable stocks slide directly into place without tools. The process involves pulling down on the stock’s adjustment lever, aligning it with the receiver extension, and sliding it forward until it locks into position.
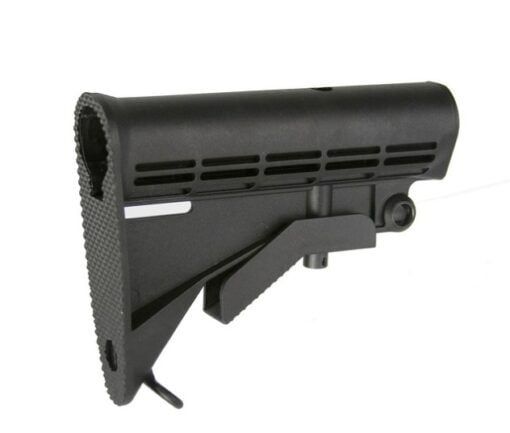
You normally do not need to remove the castle nut, buffer tube, buffer, or buffer spring. Those steps are only necessary when changing the receiver extension, converting between carbine and rifle-length systems, or installing certain folding adapters. Before beginning, confirm that the replacement stock matches the diameter and style of the existing receiver extension to ensure proper fit, adjustment, and secure operation.
Before Installing an AR-15 Stock
Make sure the firearm is completely unloaded. Remove the magazine, lock the bolt open, and visually and physically confirm that the chamber is empty. Keep the muzzle pointed in a safe direction throughout the process.
You can separate the upper and lower receivers to make the rifle easier to handle, but this is not required for a basic AR-15 stock replacement.
Step 1: Check Stock Compatibility
Before removing the existing stock, confirm that the replacement fits the receiver extension already installed on the rifle.
Carbine receiver extensions are generally available in mil-spec and commercial-pattern dimensions. A stock designed for one pattern may not fit the other correctly. Most modern AR-15 Stocks and adjustable carbine setups use a mil-spec receiver extension, but you should always verify the product specifications.
An AR-15 adjustable stock with cheek riser may also require additional charging-handle clearance. Make sure the cheek riser will not prevent the charging handle from moving fully to the rear.
An AR-15 A2 stock uses a rifle-length receiver extension and is not a simple slide-on replacement for a collapsible stock. An AR-15 foldable stock adapter also requires more installation work because the adapter mounts between the lower receiver and receiver extension.
Step 2: Remove the Existing Stock
Extend the existing AR-15 stock toward the rear and locate the adjustment lever underneath the stock body.
During normal adjustment, pressing the lever moves the locking pin just far enough to change positions. To remove the stock, you usually need to pull the lever farther downward so the locking pin completely clears the adjustment rail.
Hold the lever in that fully lowered position and slide the stock straight off the back of the buffer tube. Do not twist, pry, or force it.
The exact lever design can vary. B5 Systems, for example, instructs users to pull the adjustment lever down firmly while sliding the stock onto or off the receiver extension.
Step 3: Inspect the Buffer Tube
Once the old AR-15 stock has been removed, inspect the receiver extension.
Wipe away dirt, dust, and heavy residue. Check the tube for dents, burrs, damaged adjustment holes, or rough areas that could interfere with the new stock.
A light protective film is acceptable, but the receiver extension should not be covered in excessive lubricant. Also confirm that the castle nut and end plate appear secure. There is no reason to loosen either part during a basic stock-body replacement.
Step 4: Slide On the New Stock
Align the opening at the front of the new AR-15 stock with the end of the receiver extension. Make sure the stock is upright and lined up straight with the tube.
Pull the adjustment lever completely downward. This usually requires moving it farther than you would during normal length-of-pull adjustments.
While holding the lever down, slide the stock onto the receiver extension. Release the lever once the locking pin has passed the end of the tube.
Move the stock forward until the locking pin engages one of the adjustment positions. Manufacturer instructions commonly describe this process as pulling or pressing the adjustment lever while sliding the stock onto the receiver extension.
Step 5: Check the Installation
Move the AR-15 stock through every adjustment position. It should move smoothly and lock securely into each position.
Apply light forward and rearward pressure to confirm that it does not slide without the lever being pressed. A small amount of movement may be normal, but excessive wobble can indicate an incorrect stock size, a damaged locking pin, or a mismatched receiver extension.
Operate the charging handle with the stock in several positions. Check any sling mounts, cheek risers, storage compartments, or adjustable buttpad components according to the manufacturer’s instructions.
When Are Tools Required?
No tools are usually required when replacing only the adjustable stock body.
An armorer’s wrench is needed when removing or installing a castle nut. That work may be required when replacing the receiver extension, installing certain folding adapters, converting to an A2 stock system, or repairing the end plate area.
Do not attempt to loosen a castle nut with screwdrivers, punches, pliers, or other improvised tools. These methods can damage the castle nut or create an unreliable installation.
Follow the receiver-extension manufacturer’s instructions for torque and staking. Do not assume one torque specification applies to every aftermarket component.
Choosing the Right Replacement Stock
A butt stock for AR-15 use should match the receiver extension, lock securely, and provide a comfortable shoulder position. Options include a lightweight AR-15 shoulder stock, a compact AR-15 collapsible stock, and precision models with adjustable cheekpieces.
Searches for an AR-15 folding stock Magpul setup often refer to combining a compatible Magpul stock with a separate folding adapter. The conventional stock itself may not contain the folding mechanism.
Make sure any complete AR-15 stock configuration functions correctly and complies with applicable federal, state, and local laws. Under federal law, a rifle with a barrel under 16 inches or an overall length under 26 inches may be regulated as a short-barreled rifle unless properly registered.



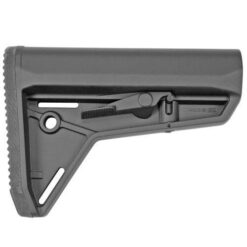

Find the Right AR-15 Stocks at Black Rifle Depot
Replacing an AR-15 stock is often a quick upgrade that can improve comfort, control, and length-of-pull adjustment without requiring tools. As long as the new stock matches the existing receiver extension, installation usually takes only a few minutes. Shop AR-15 Stocks at Black Rifle Depot to find adjustable, fixed, collapsible, and precision-focused options with quick shipping.
Frequently Asked Questions About AR-15 Stocks
A basic AR-15 stock replacement is usually a quick, tool-free project when the new stock fits the existing receiver extension. These FAQs cover compatibility, installation, adjustment, buffer-system requirements, and the limited situations where castle-nut work may be necessary.
Can you install an AR-15 stock without tools?
Yes. Most adjustable stocks can be installed without tools when the rifle already has a compatible carbine receiver extension. Pull the adjustment lever fully downward, align the stock with the tube, and slide it into place.
How do you remove an adjustable AR-15 stock?
Extend the stock toward the rear and pull the adjustment lever farther downward than you would during normal adjustment. Hold the lever down while sliding the stock completely off the receiver extension.
How do you know whether an AR-15 stock will fit?
Check whether the stock is designed for a mil-spec or commercial-pattern receiver extension. The stock and receiver extension must use the same pattern for a secure fit.
Why will the new stock not slide onto the buffer tube?
The adjustment pin may not be pulled down far enough. Pull the stock’s adjustment lever fully downward so the pin clears the end of the receiver extension. A mismatched stock and receiver extension can also prevent installation.
Can you change an AR-15 stock without removing the upper receiver?
Yes. The upper receiver can remain attached during a basic stock replacement. Separating the receivers may make the lower easier to handle, but it is not required.
Do you need a new buffer and buffer spring when changing stocks?
Not when replacing only the stock body. The existing buffer and spring can remain in place as long as the new stock uses the same receiver extension and buffer-system configuration.
Can you replace a collapsible stock with an A2 stock?
Yes, but it is not a direct slide-on replacement. An AR-15 A2 stock normally requires a rifle-length receiver extension, rifle buffer, rifle spring, stock screw, and spacer.
Can you install a fixed stock on a carbine buffer tube?
Only if the fixed stock is specifically designed for a carbine receiver extension. Traditional A1 and A2 stocks require a rifle-length receiver extension and matching buffer components.
How much movement should an adjustable stock have?
A small amount of movement can be normal, depending on the stock and receiver extension. Excessive wobble may indicate a loose locking mechanism, worn components, or a mil-spec and commercial-pattern mismatch.
Can an adjustable stock with a cheek riser block the charging handle?
Yes. Some cheek risers can interfere with charging-handle movement when the stock is fully collapsed. Check clearance in every stock position before using the rifle.
Do you need to remove the castle nut when changing stocks?
Usually not. The castle nut can remain untouched when replacing only the adjustable stock body. It must be removed when replacing the receiver extension or installing components that mount between the extension and lower receiver.
How long does it take to install an AR-15 stock?
A basic slide-on replacement usually takes only a few minutes. Replacing the receiver extension, buffer system, or castle nut will require additional time, tools, and installation steps.
For additional support and online deals, check out our X Page.
