
AR-15 Tools, AR-15 Barrels
How to Properly Torque an AR-15 Barrel Nut: A Step-by-Step Guide for 2026
Jul
Table of Contents
Installing an AR-15 barrel is one of the most important steps when building an AR-15 upper receiver. The barrel nut holds the barrel securely against the receiver and may also support the handguard and provide clearance for the gas tube.
The correct torque value depends on the specific barrel nut and handguard system. Traditional barrel nuts, free-float handguards, and enhanced upper receivers may all use different specifications, often ranging from about 20 to 65 ft-lb.
Always follow the instructions provided by the component manufacturer instead of relying on one general torque range. Proper tools, careful alignment, and the correct procedure are essential when you torque an AR-15 barrel nut.
What Does an AR-15 Barrel Nut Do?
The AR-15 barrel nut threads onto the front of the upper receiver and clamps the barrel extension flange against the receiver face. Depending on the design, the nut may also provide the mounting surface for the handguard.
A correctly installed barrel nut helps:
- Hold the barrel firmly against the upper receiver
- Maintain consistent barrel and receiver alignment
- Provide proper clearance for the gas tube
- Create a stable mounting point for the handguard
- Prevent the barrel assembly from shifting during normal use
The barrel nut does not determine headspace. Headspace is established primarily by the relationship between the bolt and the barrel extension. The nut’s job is to retain the barrel assembly securely in the upper receiver.
Understanding the Barrel Extension
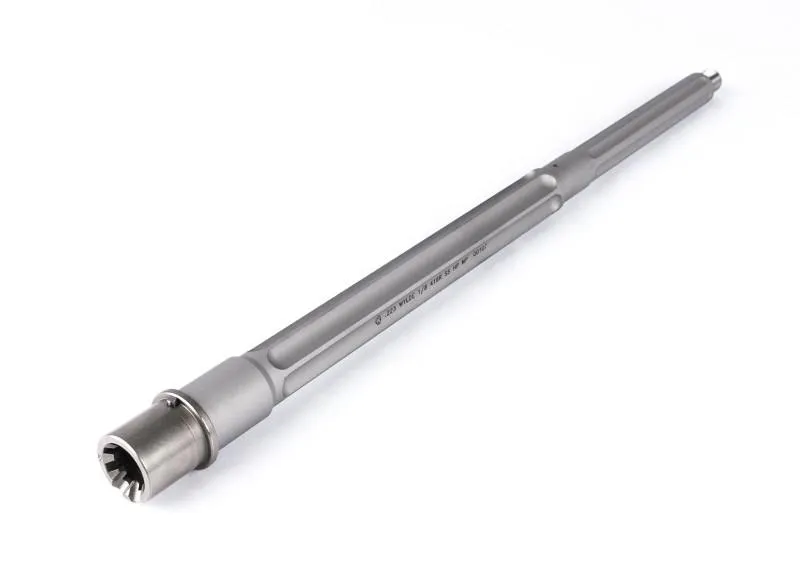
The phrase “barrel extension” for an AR-15 is sometimes misunderstood. A barrel extension is not normally an extra adapter that builders add between the barrel and receiver. It is the steel component installed on the rear of the barrel that contains the locking-lug recesses for the bolt.
Most commercially available AR-15 barrels arrive with the barrel extension already installed and properly indexed. The barrel’s index pin fits into the corresponding slot in the upper receiver, positioning the extension and barrel correctly.
Do not attempt to tighten, loosen, replace, or reposition the barrel extension as part of a routine barrel installation. Installing or timing a barrel extension requires specialized tooling and knowledge because it affects chamber relationships, indexing, and headspace.
Before installing a barrel, inspect the extension and verify that:
- The index pin is present and undamaged
- The extension fits properly into the upper receiver
- The feed ramps are compatible with the receiver
- There are no burrs, dents, or visible damage
- The extension is already secured to the barrel
When comparing the best AR-15 barrels for a build, examine more than caliber and length. Chamber specification, gas-system length, twist rate, barrel profile, muzzle threads, feed-ramp configuration, and extension quality all affect compatibility.
Is 30 to 80 ft-lb Still the Correct Torque Range?
The traditional 30-to-80-ft-lb range remains commonly associated with a standard barrel nut, but it should not be treated as a universal specification for every modern system.
Proprietary barrel nuts frequently use narrower or entirely different specifications. For example:
- Aero Precision lists 35–65 ft-lb for its ATLAS barrel nut.
- Aero Precision specifies 65 ft-lb for its M5E1 barrel nut.
- Geissele instructions for certain Super Modular Rails specify 50 ft-lb.
- Midwest Industries instructions vary by handguard model, with examples that specify 20 ft-lb or 40 ft-lb. ight should an AR-15 barrel nut be?” is therefore:
Use the exact torque value or range provided by the manufacturer of the barrel nut, handguard, or enhanced upper-receiver system.
Do not automatically apply a general 30-to-80-ft-lb range to a proprietary barrel nut. Doing so could result in insufficient clamping force, damaged threads, a distorted receiver, or an improperly installed handguard.
Tools Needed to Torque an AR-15 Barrel Nut
Using proper tools protects the upper receiver and makes the torque reading more consistent.
Bench Vise
A solid bench vise keeps the upper assembly stable. The vise should be firmly mounted to a workbench and large enough to hold the receiver fixture securely.
Upper-Receiver Fixture
Use a quality upper-receiver block, reaction rod, or manufacturer-approved holding fixture. The fixture must be compatible with the upper receiver and the installation procedure.
A receiver rod can support the upper internally and is especially useful for barrel-nut installation or removal. Some tools engage the barrel extension and help reduce the amount of force transferred through the exterior of the receiver.
Follow the manufacturer’s directions. Not every receiver rod or clamshell block is appropriate for every forged, billet, or enhanced upper receiver.
Torque Wrench
Use a calibrated foot-pound torque wrench with a working range appropriate for the required specification. A torque wrench is most accurate when the desired setting falls comfortably within its operating range.
Do not use a torque wrench as a breaker bar. Use a separate ratchet or breaker bar for removal and reserve the torque wrench for final tightening.
AR-15 Barrel Nut Wrench
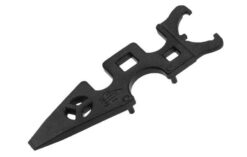
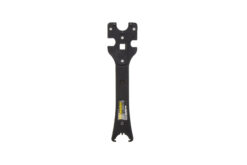
The AR-15 barrel nut wrench must match the barrel nut. A standard armorer’s wrench may work with a traditional nut, while many free-float handguards require a proprietary wrench supplied or sold by the manufacturer.
Inspect the engagement surfaces before use. A poorly fitting AR-15 barrel nut wrench can slip, deform the nut, or produce an inconsistent pull.
The alternate phrase AR-15 barrel nut wrench is often used interchangeably with armorer’s wrench, but the tools are not always identical. Confirm that the tool engages the exact barrel-nut design being installed.
Approved Thread Lubricant
Use the lubricant specified by the component manufacturer. Many installation instructions call for grease or anti-seize on the receiver threads, but the exact product matters because lubricated and dry threads can produce different clamping loads at the same torque reading.
Avoid guessing. Follow the manufacturer’s directions regarding:
- Whether the threads should be lubricated
- Which lubricant should be used
- Whether the barrel nut should be seasoned
- Whether thread locker is permitted
- Whether shims are required
Gas-Tube Alignment Tool
A gas-tube alignment rod can help confirm that the gas-tube channel is unobstructed. This is particularly helpful with traditional barrel nuts that have teeth or openings through which the gas tube must pass.
Some modern barrel nuts do not require gas-tube timing. In those systems, alignment procedures may instead relate to the handguard, anti-rotation tabs, or indexing hardware.
Manufacturer Instructions
The instruction sheet is one of the most important “tools” on the bench. Review it before installing any component, even when you have completed previous upper builds. Barrel-nut systems that look similar may use different torque values, wrench positions, shims, fasteners, or installation sequences.

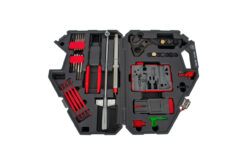
How to Torque an AR-15 Barrel Nut
The following procedure provides a general overview. The component manufacturer’s instructions take priority whenever they differ.
Step 1: Confirm Compatibility
Before assembly, verify that the following components are compatible:
- Barrel and upper receiver
- Barrel extension and receiver feed ramps
- Barrel nut and upper-receiver thread pattern
- Barrel nut and handguard
- Gas block and handguard clearance
- Gas-system length and gas tube
- Muzzle threads and intended muzzle device
This is especially important with nonstandard receivers and proprietary handguards.
A standard AR-15 threaded barrel generally refers to a barrel with external muzzle threads for a compatible muzzle device. Those muzzle threads are unrelated to the upper-receiver threads used by the barrel nut. Confirm both specifications separately.
Step 2: Inspect and Clean the Components
Inspect the upper-receiver threads and barrel nut for:
- Burrs
- Cross-threading
- Metal chips
- Damaged teeth or wrench flats
- Excess finish buildup
- Dirt or old thread compound
Clean the receiver threads, barrel extension exterior, receiver socket, and barrel-nut threads as directed by the manufacturer. Do not remove material from the receiver face or barrel extension unless following a specialized procedure with the proper equipment.
Step 3: Secure the Upper Receiver
Install the upper receiver in the correct holding fixture and clamp the fixture in the vise. The upper should be stable without being crushed or distorted.
Do not clamp the bare upper receiver directly in the vise. Also avoid improvised holding methods that concentrate force on the Picatinny rail, ejection-port area, or thin receiver walls.
Step 4: Apply the Specified Lubricant
Apply a light, even coating of the manufacturer-approved lubricant to the appropriate receiver and barrel-nut threads.
More lubricant is not necessarily better. Excess material can collect debris or migrate into areas where it is not needed. Use enough to coat the threads without leaving heavy clumps.
Step 5: Install the Barrel
Align the barrel-extension index pin with the slot in the upper receiver, and carefully insert the extension into the receiver.
Seat the barrel fully. The extension flange should rest against the receiver face without visible gaps. Do not force the barrel into place using the barrel nut.
A tight-fitting extension may require careful inspection and cleaning. Do not hammer the barrel into the receiver or remove material without first determining why the fit is unusually tight.
Step 6: Thread the Barrel Nut by Hand
Start the AR-15 barrel nut by hand. It should rotate smoothly for several turns without binding.
Stop immediately if it becomes difficult to turn at the beginning of thread engagement. Back it off and inspect for crossed or damaged threads. Do not use the wrench to force a barrel nut that will not thread correctly by hand.
Step 7: Position the Torque Wrench Correctly
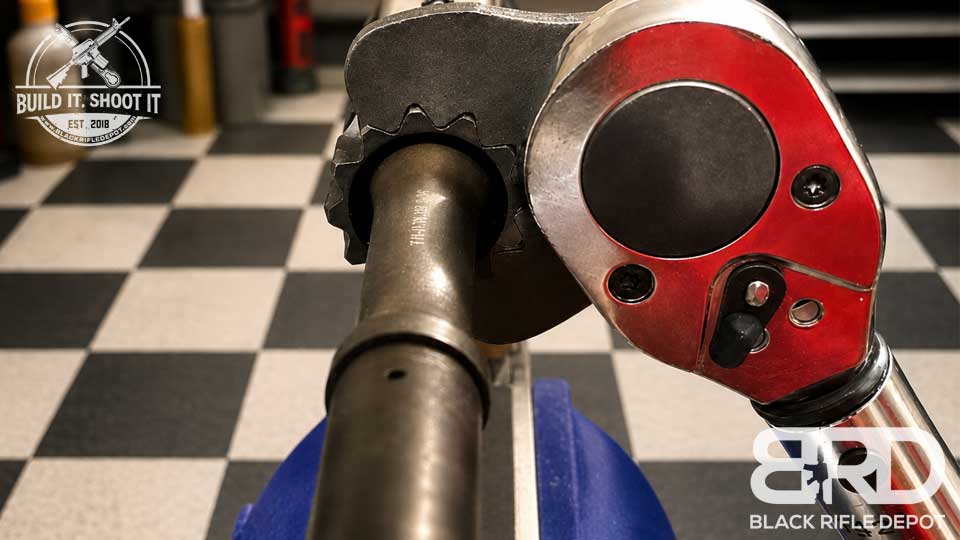
Attach the correct AR-15 barrel nut wrench to the nut, then connect the torque wrench.
Whenever possible, keep the barrel-nut wrench at 90 degrees to the torque-wrench handle. This arrangement generally avoids changing the effective lever length. If the adapter must extend in line with the torque wrench, determine whether the manufacturer requires a torque-value correction.
Some manufacturers design their wrenches and published values so the installer can use the listed setting. Follow their exact directions rather than applying a generic correction formula. Midwest Industries, for example, instructs users to set the torque wrench to the listed specification and tighten the nut as directed.
Set the torque wrench to the manufacturer’s specified value and apply steady pressure.
Do not jerk the wrench, bounce against the click, or continue pulling after the torque wrench signals that the setting has been reached. Sudden force can produce an inconsistent reading or cause the wrench to slip.
The procedure to torque an AR-15 barrel nut may involve:
- One final torque application
- Multiple torque-and-loosen cycles
- A specified minimum and maximum range
- Timing the nut for gas-tube clearance
- Installing shims before final torque
- Tightening to one fixed value without timing
Aero Precision’s BAR barrel-nut instructions, for example, describe loosening and retorquing before reaching the prescribed installation condition. In contrast, its ATLAS instructions specify a torque range and the use of shims when necessary—the exact system on the bench.
Step 9: Check Gas-Tube Clearance
For a traditional nut that must be indexed, check the gas-tube path after reaching the minimum specified torque.
When additional rotation is required, tighten the nut to the next aligned position without exceeding the maximum torque. Do not loosen the barrel nut below the final specification merely to obtain alignment.
Never grind away a barrel-nut tooth or force the gas tube through an obstructed opening. With systems that use shims, install the correct shim combination and repeat the manufacturer’s torque procedure.
Step 10: Confirm Alignment
Pass the gas tube or alignment rod through the receiver and barrel-nut channel. It should move freely without being pushed to one side.
After installing the gas block and gas tube, check the tube’s position inside the upper receiver. The bolt-carrier key should pass over the gas tube without significant resistance or deflection.
A barrel nut that does not require gas-tube timing must still be installed to the correct torque. Do not rotate it beyond the specified value merely to make the handguard appear aligned. Follow the handguard’s separate alignment procedure.
Step 11: Install the Handguard
Install the handguard using its supplied hardware and torque values. Handguard screws generally use inch-pounds, not foot-pounds. Confusing the two units can easily damage screws, inserts, clamps, or the handguard itself.
Apply thread locker only when the instructions call for it. Some manufacturers specify thread locker for handguard screws, while others prohibit it on certain components.
Step 12: Complete a Final Inspection
Before completing the upper assembly, verify:
- The barrel is fully seated
- The barrel nut is within specification
- The gas-tube path is clear
- The gas tube is centered
- The handguard is aligned
- All handguard fasteners are properly torqued
- The gas block has adequate handguard clearance
- The muzzle device is correctly installed
- The bore is clear
- The bolt carrier moves freely
When installing a new barrel and bolt combination, checking headspace with appropriate gauges is a prudent step, especially when component compatibility or condition is uncertain.
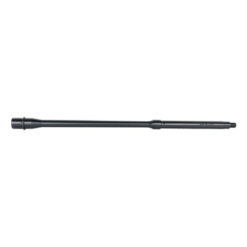
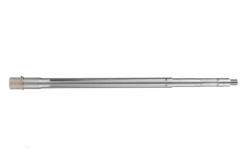

Does Barrel Type Change the Torque Procedure?
The barrel’s material, profile, and length can affect how the rifle handles, but they do not automatically change the barrel-nut torque specification. The barrel-nut or handguard manufacturer still determines the required torque procedure.
Standard AR-15 Barrels
Most conventional AR-15 barrels use a steel barrel extension that fits into a standard upper receiver. The barrel nut and handguard primarily determine the installation method.
When selecting among the best AR-15 barrels, consider the intended use. A general-purpose carbine, lightweight rifle, precision build, and high-volume training rifle may benefit from different lengths, profiles, twist rates, and materials.
AR-15 Bull Barrel
An AR-15 bull barrel uses a heavy profile designed to resist heat-related point-of-impact changes and provide greater rigidity. Its additional diameter and weight can create compatibility issues with some gas blocks and narrow handguards.
Before installing an AR-15 bull barrel, verify:
- Gas-block journal diameter
- Handguard internal diameter
- Muzzle-thread specification
- Barrel-nut and handguard clearance
- Overall weight and balance
The heavier profile does not justify exceeding the stated barrel-nut torque.
Carbon-Fiber AR-15 Barrel
A carbon-fiber AR-15 barrel commonly uses a steel barrel liner or core wrapped with a carbon-fiber composite structure. These barrels can reduce forward weight while retaining useful stiffness, but installation instructions may include limits on clamping, heating, or the use of certain tools.
Never clamp directly onto the carbon-fiber portion of the barrel. Follow the barrel manufacturer’s guidance for installation, gas-block fit, muzzle-device torque, and cleaning.
The upper and barrel-nut system still determines the barrel-nut torque for a carbon-fiber AR-15 barrel unless the barrel manufacturer provides additional requirements.
AR-15 Threaded Barrel
An AR-15 threaded barrel allows installation of a compatible muzzle device. Confirm the muzzle thread pattern before purchasing a flash hider, muzzle brake, compensator, thread protector, or suppressor-mounting device.
Do not confuse muzzle-device torque with barrel-nut torque. They are separate procedures that use different interfaces and may require different holding methods.
What About an AR-15 Barrel Shroud?
An AR-15 barrel shroud surrounds part of the barrel without functioning as the barrel itself. The phrase may refer to a cosmetic sleeve, heat shield, handguard-like covering, or protective component.
A barrel shroud is not a substitute for a handguard unless it was designed and tested for that purpose. Before installing an AR-15 barrel shroud, check:
- Internal clearance around the barrel
- Clearance around the gas block and gas tube
- Attachment method
- Heat resistance
- Compatibility with the muzzle device
- Whether it could contact the barrel during firing
Contact between the barrel and an improperly installed shroud or handguard can interfere with free-floating performance and may affect point of impact.
Common Barrel-Nut Installation Mistakes
Assuming Every Barrel Nut Uses 30–80 ft-lb
This is one of the most important errors to avoid. Proprietary systems frequently use a fixed setting or a narrower range. Follow the specific instructions for the installed hardware.
Using the Wrong Wrench
A loose-fitting AR-15 barrel nut wrench can slip and damage the barrel nut. Use the exact wrench required by the component manufacturer.
Applying Torque to Dry Threads Without Checking Instructions
Published torque values may assume a specific lubricant. Dry threads can create different friction and clamping results. Use the lubricant and preparation method stated in the instructions.
Cross-Threading the Barrel Nut
The nut should begin smoothly by hand. If it binds immediately, stop and inspect the threads rather than forcing it with a wrench.
Exceeding the Maximum to Obtain Alignment
Never exceed the maximum specification to line up a gas-tube opening. Depending on the system, use the next valid position, repeat the prescribed torque cycle, or install the approved shim.
Backing Off the Final Torque for Alignment
Loosening the nut after the final torque application can reduce clamping force. Traditional indexed nuts should normally be advanced to alignment within the permitted range, not backed off from the final position.
Using the Torque Wrench as a Breaker Bar
A torque wrench is a measuring tool. Using it to loosen seized parts can affect calibration or damage the mechanism.
Confusing Inch-Pounds and Foot-Pounds
Barrel nuts typically use foot-pounds, while small handguard screws frequently use inch-pounds. Always check the unit before tightening.
Assuming the Barrel Extension Must Be Installed
A standard barrel extension for AR-15 is generally already attached to a new barrel. Attempting to adjust it during a routine build can create serious indexing and headspace problems.
Forcing the Gas Tube
The gas tube should pass through the barrel-nut and upper-receiver channel without being forced. Binding may indicate incorrect nut timing, a bent gas tube, improper gas-block alignment, or an incompatible component.
Final Thoughts
Proper barrel-nut installation comes down to using the right tools, following the correct torque specifications, and checking alignment before completing the upper. Because barrel nuts and handguard systems vary, the manufacturer’s instructions should always take priority over a general torque range.
Taking a few extra minutes to confirm fit, lubrication, and gas-tube clearance can help prevent damaged parts and installation problems.
Shop AR-15 barrels at Black Rifle Depot to find the right option for your next build or upgrade.


Frequently Asked Questions About AR-15 Barrel-Nut Torque
The following answers address common questions that arise while installing barrels and modern handguard systems.
What is the correct AR-15 barrel-nut torque?
There is no universal value for every system. A traditional setup may use a broader torque range, while proprietary handguards may specify 20, 40, 50, 55, or 65 ft-lb. Follow the instructions for the exact barrel nut or handguard being installed.
Can I reuse an AR-15 barrel nut?
It depends on its condition and the manufacturer’s instructions. Do not reuse a nut with deformed teeth, damaged threads, rounded wrench flats, cracks, or significant corrosion. Some handguard manufacturers may also require new hardware.
Should I use thread locker on the barrel nut?
Not unless the manufacturer specifically directs you to do so. The barrel nut is normally retained by proper thread engagement and torque. Threadlocker can affect installation and make future removal more difficult.
Do I need to season the threads?
Some installation procedures call for tightening, loosening, and retightening the barrel nut. Others require only one final torque application. Follow the instructions for the specific system instead of automatically cycling every barrel nut.
Can I install a barrel without a torque wrench?
A torque wrench is strongly recommended. Tightening by feel does not confirm that the nut is within the manufacturer’s required range.
Can a loose barrel nut affect accuracy?
Yes. A loose barrel nut may allow movement between the barrel and upper receiver. It can also affect handguard stability and overall consistency. Stop using the upper and inspect the assembly if looseness is suspected.
Does an AR-15 bull barrel need more barrel-nut torque?
No. A heavier barrel profile does not automatically require a higher torque value. Use the specification provided for the barrel nut, handguard, or upper-receiver system.
Does a carbon-fiber barrel use a different barrel nut?
Not necessarily. Many carbon-fiber barrels use a standard-compatible barrel extension and barrel-nut interface. However, the barrel manufacturer may provide special handling or installation instructions.
Is the barrel extension a separate adapter?
Not during a typical build. The barrel extension is generally installed on the barrel before it reaches the customer. The completed barrel assembly is then inserted into the upper receiver.
Do all barrel nuts need gas-tube alignment?
No. Traditional barrel nuts often require timing so the gas tube can pass through an opening. Many modern free-float barrel nuts have an unobstructed gas-tube path and do not require timing.
How do I know whether my wrench changes the torque reading?
Keeping the adapter at a 90-degree angle to the torque-wrench handle generally avoids changing the effective lever length. If the adapter extends in line with the handle, a torque correction may be required unless the manufacturer’s instructions already account for the supplied wrench.
For additional resources, check out our X Page.
